This post may contain affiliate links. If you make a purchase through a link, I may receive a small commission, at no cost to you. These commissions help keep this website up and running, and I thank you for your support. Read my full disclosure here.
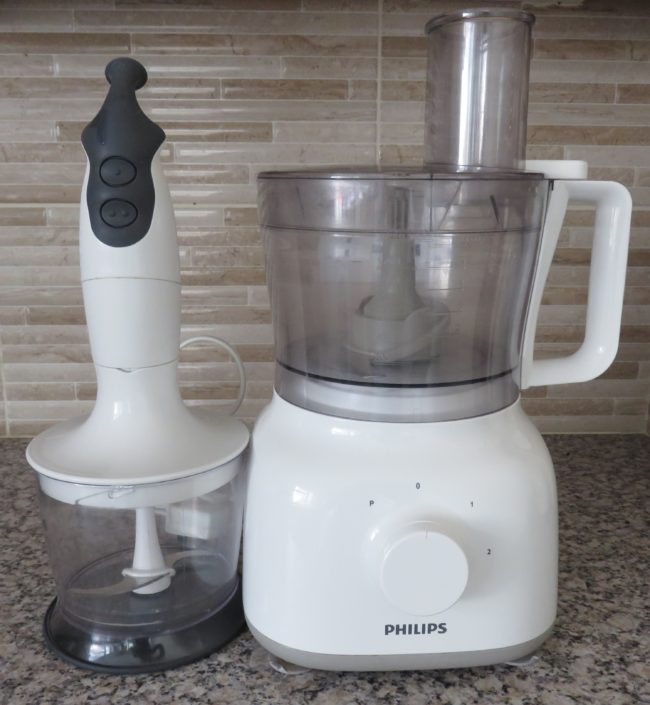
I bought my large food processor and blender a few years ago. I love to cook, so I use both of them on a regular weekly basis. Recently, I’ve noticed both of them struggling to chop anything. Instead of slicing through the food, they were roughly tearing up the contents and flinging them against the sides of the bowl, which was causing banging and crunching sounds. My parsley looked like it had been chewed up rather than finely chopped, the tomatoes were turned into mush, and the chillis were mangled and remained in large chunks. I had to finish them off with a knife.
I realised that I had had my appliances for over a year and had never sharpened the blades, which is an essential step in maintaining your food processor and blenders. You can purchase a replacement blade for your machine if you wish, however, these are usually very expensive. Instead, I recommend you just sharpen them yourself. Purchasing a sharpening device is a better value because you get to use it again and again, and also use it to sharpen all of your knives.
This weekend I set about sharpening my blades, which is super easy to do and only takes 5 minutes. (Which made me question why I hadn’t bothered to get around to doing this earlier). All you need is a few key pieces of equipment.
Safety Gloves
Safety first! To ensure you don’t cut yourself, wear some cut resistant gloves as you sharpen your blades. After very badly grating off my knuckle to the bone (not the first time, but definitely the worst time), and spending several months using special dressings to regrow the flesh (gross I know), I purchased myself some cut resistant gloves. Considering how cheap these things are, I wish I had purchased them a long time ago. They are very durable and light, not bulky at all, and very comfortable to use. These gloves are amazing, I use them whenever I grate and if I am doing fine chopping with our super sharp Global knife. They are also easy to wash, you can just throw them in the washing machine. I tend to give mine a hand wash in the sink with some kitchen detergent, then hang them out to dry on the rack.
How to Sharpen Your Food Processor and Blender Blades
The blades of food processors and food blenders are a bit awkward to sharpen because they are short and curved, and very fine. If you are serious about blade and knife sharpening, then the best piece of sharpening equipment is a whetstone such as this Premium Sharpening Stone 2 Side Grit 1000/6000. However, you do need to have some level of skill to use these sharpening stones, something I don’t really have. A sharpening steel similarly needs skill to use, but because of the awkwardness of the small rounded blades, you can’t really use one to sharpen the processor blades.
Option 1: Ceramic Sharpener
I like to use a simple sharpening tool. For my processor and blender blades, I used the sharpener for my Global knives from Japan because it is made for very fine blades. Asian knives are super sharp because the blade is cut at a 15 degree angle, compared to the standard 20 degree knives used in Europe and the USA. I was lucky to get a Global Sharpener included with the purchase of my Global knife, but you can purchase a Global Ceramic Knife Sharpener from Amazon. The Global ceramic sharpeners are quite pricey, so here is a link to a similar, but cheaper, ceramic sharpener. I haven’t tried this one, but it gets good reviews. Sharpening with a ceramic rather than a whetstone is much faster as it is much harder. Ceramic also lasts longer. To sharpen your blades, you need to follow the Global ceramic sharpener instructions, which I have outlined below.
Step 1
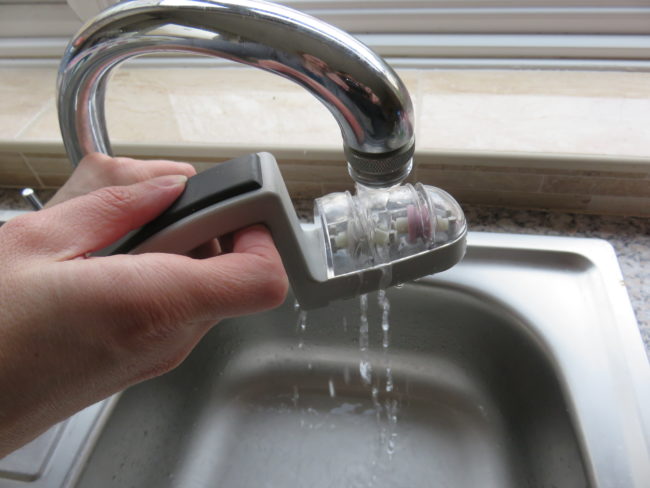
Fill the sharpener with water and leave it to soak for 3-5 minutes. The water helps the ceramic sharpeners work their best.
Step 2
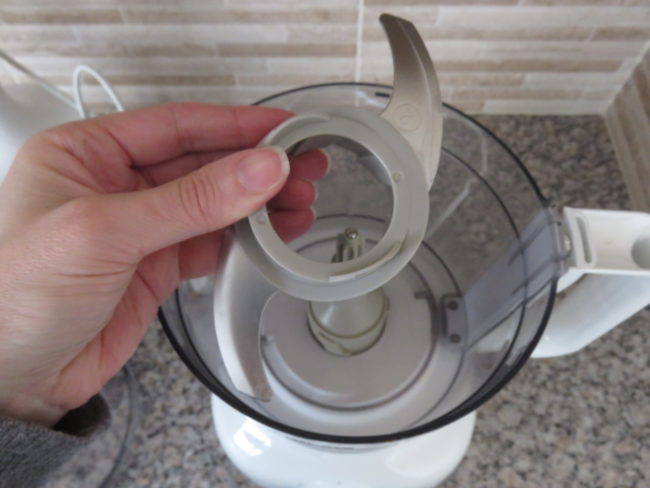
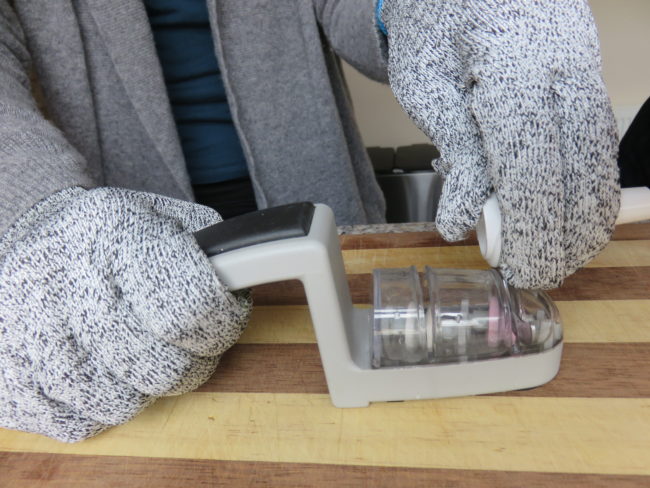
Place the sharpener on your kitchen bench or work surface. To more easily position the blade, you can remove the plastic cover* (see my notes below), but make sure you keep your blade straight.
Step 3
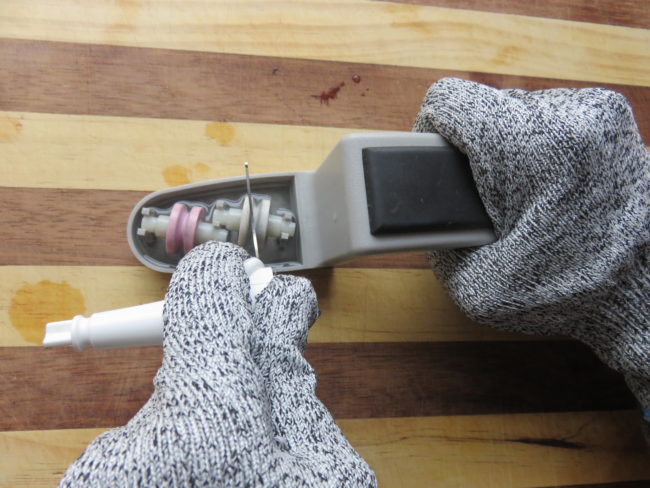
Wearing your cut resistant gloves, firmly grip the handle of the sharpener with your free hand and with the other, hold the blade by its spindle. Run the blade gently through the first courser white slot 7 times. There is no need to apply excess pressure as the ceramic wheels will do all the work and are set at the perfect angle to sharpen the blade evenly.
 Step 4
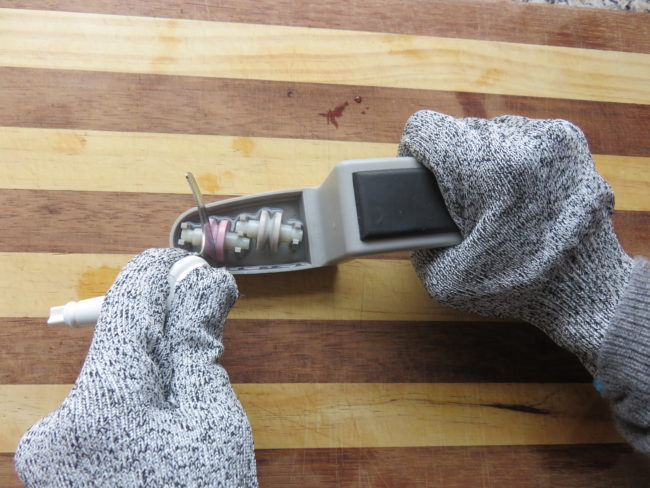
Then pass the blade through the pink ceramic wheels 7 times. You can test the blade’s sharpness by running it across some paper.
 Step 5
After sharpening, give your blades a good clean to remove any residue. See my instructions for cleaning the blades below.
*As the blades are short and an awkward shape, I found that removing the plastic cover that guides your blade straight allowed me to better sharpen the base of the blade. If you do remove the plastic guide, make sure you keep the blade straight.
Option 2: Combined Diamond Sharpeners
In order to cut down on the amount of equipment in your kitchen drawers, think about purchasing a dual sharpener that will work on your slim food processor and blender blades and your Asian and standard European and American knives. They are a lot more versatile because they work well on double and single sided blades and also on serrated blades.
These are the top two rated combination/dual sharpeners on the market:
- Cheaper model: Chef’sChoice 4643 ProntoPro Diamond Manual Knife Sharpener for Euro-American and Asian Style Knives
- Luxury model: Chef’s Choice 1520 Angle Select Diamond Professional Electric Knife Sharpener for 15 & 20 degree Knives.
Sharpening Very Slim Double Edge and Single Edge Blades
Each stage has two slots. If your blade has a double sided edge, then alternate it between the two slots. If it is only a one sided blade, then only use the first slot.
Step 1
- Double sided blade: Place your double sided blade into the stage 1 slot and slide it slowly and smoothly through the device alternating between the two x stage 1 slots. You should only need to alternate twice on each side of stage 1.
- Single sided blade: For single sided blades, only use stage 1’s first slot.
Step 2
- Double sided blade: Move the knife to stage 3 and similarly, slowly slide the knife through the slots and alternate between the two. 3 – 4 alternating pulls should smooth off and finish the knife.
- Single sided blade: For single sided blades, only use stage 3’s first slot.
Sharpening Thicker Double Edge and Single Edge Blades
Step 1
- Double sided blade: Place your double sided blade into the stage 2 slot and slide it slowly and smoothly through the device, alternating between the two stage 2 slots. You should only need to alternate twice on each side of stage 2.
- Single sided blade: For single sided blades, only use stage 2’s first slot.
Step 2
- Double sided blade: Move the knife to stage 3 and similarly, slowly slide the knife through the slots and alternate between the two. 3 – 4 alternating pulls should smooth off and finish the knife.
- Single sided blade: For single sided blades, only use stage 3’s first slot.
Sharpening Serrated Blades
Step 1
- Place your serrated blade into the stage 3 slot and slowly slide it through. If it is a double sided blade, alternate between the two slots. 3-4 alternating pulls should sharpen your blade.
How to Clean Your Food Processor and Blender Blades
Tempting as it is, don’t wash your blades, or even knives for that matter, in the dishwasher. Cleaning them in the dishwasher causes the blade to go blunter quicker due to the intense heat and moisture, which can also cause rust. They can also end up rattling around and banging against the plastic dishwasher racks and other items, which causes fine chips in the blade. Dishwasher detergent can also be corrosive (especially the salt that it can contain) and cause pitting and dull your blades. Instead, you need to wash your blades by hand in hot, soapy water and dry them with a soft towel.
How to Store Your Food Processor and Blender Blades
Don’t place your blades in your cutlery drawer. Not only is it dangerous because you might end up cutting yourself, but it also causes fine chips and trauma as the blades bang and rub up against the other items in your drawer. If your device came with its own blade storage case, then make sure you use it. If it didn’t come with a storage case, just store them inside the device on its spindle, all set up and ready to go when you need it next.

 Step 4
 Step 5

Leave a Reply