
This post may contain affiliate links. If you make a purchase through a link, I may receive a small commission, at no cost to you. These commissions help keep this website up and running, and I thank you for your support. Read my full disclosure here.
Disclaimers: I have in no way been influenced or paid to endorse these products. All recommendations are my own.
Warning: Always apply a test patch before using.
It’s winter again and because I live in a cold climate, my skin gets really dry and scaly. I’ve always loved oil based lotions and body butters that leave a protective moisturising barrier over my skin. My all time favourite body cream is Kiehls Moisturising Care Creme de Corps, but it is really expensive so I’ve tried to create a similar creamy butter packed with lots of soothing and moisturising ingredients. This butter is also perfect for people prone to eczema caused by the change in weather.
Because this body butter doesn’t contain any water, you don’t have to add preservatives. However, I store the body butter I’m not using in the fridge to help extend its shelf life. I also add vitamin E, not only for its anti-ageing, restorative properties, but because it is an anti-oxidant which helps keep the oils in this recipe from going rancid (just to be clear, it is not a preservative).
A little goes a long way, so when applying, use a small amount and massage into skin after a hot shower or bath. I like to apply it as soon as I get out of the shower in the morning, then I give it 5-10 minutes to absorb into my skin whilst I’m brushing my teeth and applying my deodorant and face cream etc… If you don’t like using oils on your body, then this recipe is not for you.
Key Ingredients
Shea Butter
Shea butter is my butter of choice because it’s a gentle, effective moisturiser. Similar to the jojoba oil, it is very similar to sebum (our skin oil) so it absorbs well into the skin. It reduces inflammation and smooths rough skin..
Coconut Oil
I love using coconut oil for cooking and beauty. Coconut oil comes from the nut (fruit) of the coconut palm. It has a soothing, moisturising, anti-inflammatory affect and has some antimicrobial properties. Alongside this body butter recipe, I also use it as a hair mask for taming my frizzy, curly hair, and as a treatment for my scaly, dandruff scalp. It is an amazingly hydrating product, however, most people don’t know that coconut oil has a high comedogenic rating, and therefore isn’t recommended for use on the face. If you are prone to body acne, then substitute coconut oil for sweet almond oil.
Argan Oil
Whilst holidaying in Morocco, I purchased a precious bottle of cosmetic Argan oil, and upon returning home, I was determined to put it to good use. Argan oil comes from the argan tree’s nut and is rich fatty acids, vitamin E and A, and antioxidants, all of which beautifully hydrate skin, soften fine lines, plump skin, and fade dark spots and scars. which is why I decided to use it to create my own facial oil. If you get the chance to visit Morocco whilst the tree is fruiting, you will see it filled with goats, as they love to feast on them. I also use argan oil in my Luxury Anti-Ageing Facial Oil recipe.
If you don’t have any argan oil, or simply want to reduce the cost of this recipe, then substitute it for sweet almond oil. I often don’t have any argan oil, so regularly substitute it for sweet almond oil.
Sweet Almond Oil
I love sweet almond oil because not only is it very moisturising, but it is also very affordable. It’s also packed with vitamin E, so it is great for dry and sensitive skin.
Jojoba Oil
The use of the word ‘oil’ is very misleading because jojoba oil is actually a wax. Pronounced ‘ho-ho-ba’, it acts as an emollient which means it provides a protective film over your skin to trap in moisture. It is also very similar to our own sebum (skin oils), so it absorbs easily into the top layer of the skin. Due to these moisturising properties, jojoba is popular in skin care products. It’s super hydrating and its moisturising properties makes it a good skin plumper.
Beeswax/Cadelilla Wax
The inclusion of wax in this recipe helps to firm up the butter and also soothe, protect, and nourish the skin. I like to use white beeswax pellets because the pellets are easy to use (no grating!) and melt. If you use yellow pellets, it will give your body butter a yellow tint.
I know how hard it can be for vegans to find vegan friendly cosmetics, so this recipe can easily be adapted to make it vegan. Substitute the beeswax with candelilla wax, which is a natural wax derived from the leaves of the small Candelilla shrub that is native to northern Mexico and the southwestern United States. Candelilla wax sets much firmer than beeswax, so I suggest using half the amount. Alternatively, if you prefer, you can just not use wax in this recipe.
Vitamin E Oil
Vitamin E oil has been used for many years in skin care. It can alleviate itching, dryness and flaking. It can also help soothe inflammation. Vitamin E is not a preservative, but it is an anti-oxidant which will help to keep the oils in this body butter from going rancid. Vitamin E is safely used at 1-5% concentrations. I usually use it at around 1-2%.
Lavender Essential Oil
I also added lavender essential oil to my body butter recipe, not just because I love the smell of it, but also because it’s skin soothing and great for irritated skin. I also love that it’s relaxing and calming.
In this recipe I used a 2% dilution which is considered the ‘ideal’ amount for most adults in topical applications such as this body butter recipe. So basically that works out to be 10 – 12 drops per fluid ounce/ 30 ml of carrier oil. If you are trying to work out how many drops this is for your container size, then use this handy dilution conversion guide.
It’s important that you don’t add the essential oil into the mixture while it is still hot, otherwise the lovely scent will just evaporate. Wait until it has cooled down.
Arrowroot Powder or Cornstarch
Arrowroot powder is a starch derived from a South American plant and is used as a thickener in recipes. It is very similar to cornstarch, so you can substitute if you like. The addition of arrowroot powder gives this body butter a silkier texture and makes it a little less oily.
Which Containers to Use
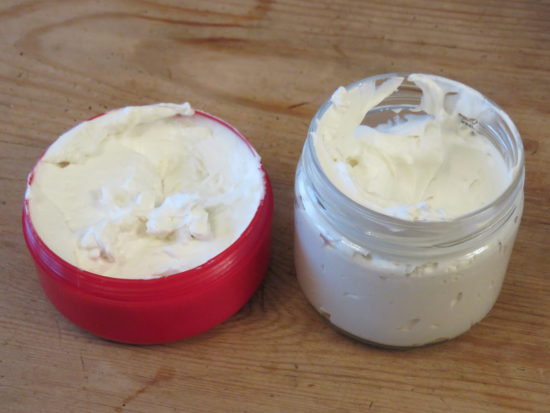
This recipe makes about 350ml, depending on whether you are using US or UK measurements and how fluffy you whip it. I love to reuse old salsa glass jars like these or old face cream jars like these. The smaller jars make perfect gifts. Make sure that the jars are very clean before using to extend its shelf life. I run them through a hot cycle in my dishwasher (be careful dishwashing plastics as they may not be dishwasher safe). I like to put the larger jar in the bathroom, then I place a smaller jar by my bedside to use as a hand cream at night.
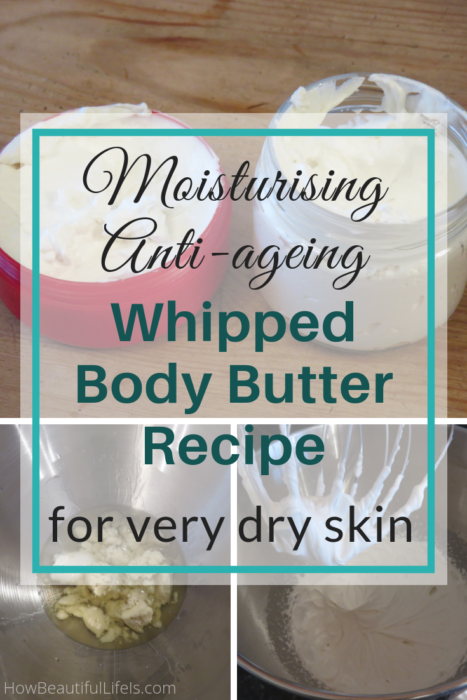
Moisturising, Anti-Ageing Whipped Body Butter Recipe for Very Dry Skin
Ingredients
- 1/2 cup Shea butter
- 1/4 cup coconut oil
- 1 tbsp cosmetic Argan oil You can substitute with sweet almond oil
- 2 tbsp sweet almond oil
- 1 tbsp Jojoba oil
- 1 tsp white beeswax pellets (optional) vegans can use 1/2 tsp of candelilla wax
- 1 tsp Vitamin E oil
- 1 tsp lavender essential oil (optional)
- 1 tsp arrowroot powder you can substitute with cornstarch
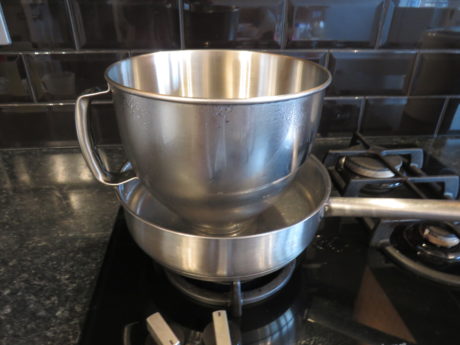
- 1 heatproof bowl I make it in my steel KitchenAid mixing bowl
- 1 handmixer or standmixer
- 1 large saucepan
- 350 ml jar/container
Instructions
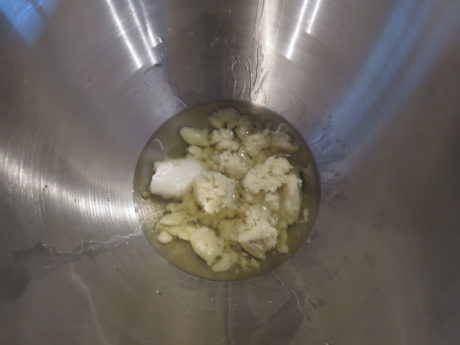
- Place the shea butter, coconut oil, argan oil, sweet almond oil, jojoba oil and beeswax into your heatproof bowl and place it into a saucepan filled with 5 cm (2 inches) of hot water that is sitting over a medium-low heat. (I make it in my steel KitchenAid mixing bowl to save on washing up, but you can also use a glass pyrex bowl)

- Make sure that none of the water from the saucepan gets into your oils.
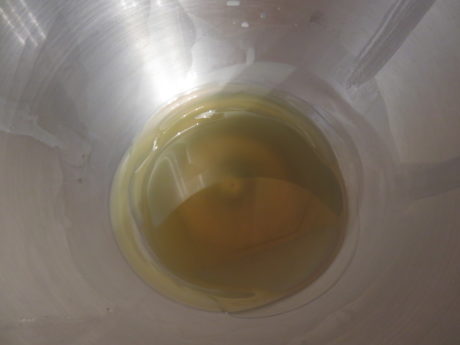
- Gently stir until the ingredients have completely melted into a liquid and combined. Don't leave it sitting on the heat any longer than needed, as you don't want it to get too hot otherwise it could reduce the efficacy of the ingredients.
- Remove the bowl from the saucepan and dry off the water from the outside of the bowl so it doesn’t drip onto your work surface and salve.
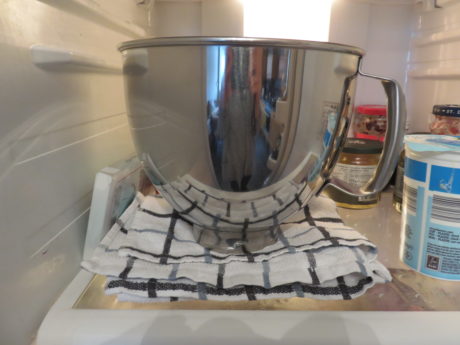
- Place the mixture into the freezer for about 30 mins or fridge for about 60 mins, or until it has started to harden around the edges. If you live in a hot climate you may need to leave it cooling for longer. But don't let it completely cool, otherwise it will be too hard to whip.
- Add the arrowroot powder and your essential oil and whip with your electric mixer until it turns white and becomes creamy and fluffy.
- Place it in the fridge for 15 mins to cool down and firm up. If you live in a hot climate you may need to leave it longer.
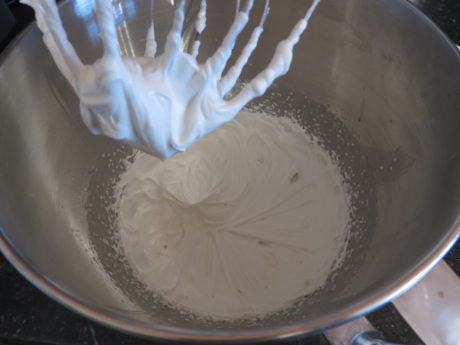
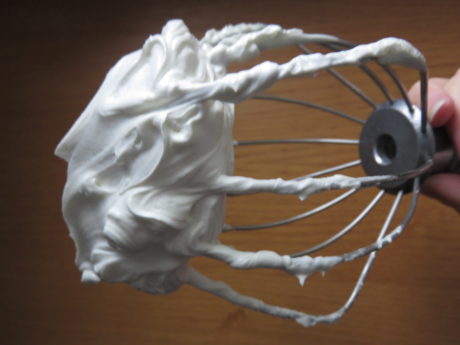
- Whip again with your electric mixer until fluffy and forming stiff peaks like firm meringue.
- Place it back in the fridge for 10-15 mins to firm up again and dispense it into your containers.

Notes
- You can use US or UK measurements, it is not essential to be perfectly precise!
- It's important that you don't overheat the oils, as this can destroy their nutrients and therefore lose its efficacy.
- If you live in a hot climate, you may need to add more wax to ensure a firmer consistency. You may also need to leave it in the fridge longer between whipping, and after the final whip.
- Don't add the essential oil into the mixture while it is still hot, otherwise the lovely scent will just evaporate. Wait until it has cooled down.
- If you leave it too long in the fridge or freezer, then just warm the butter up again.
- If you prefer not to use essential oils, then leave it out.
- This recipe does not contain water so does not need a preservative. It has about a 6 month shelf life. To extend it’s shelf life, keep in the fridge when not in use and always use clean hands to apply.


Siena
Is it the shea butter or beeswax that is pilling up in my homemade cream? Not sure what to do. When I made the cream it is smooth but as time goes by small hard chunks get in there.
Thanks
Colleen
I’m just wondering if it is actually the shea butter doing this? Here is a blog post that explains the grainy texture that can occur. The key is to heat it up slowly, get it hot enough to ensure everything has melted completely, then cool it quickly.
Sharon Graham
After I have had it made for a while the bees wax becomes hard lumps in the cream when I put it on. Small hard ones the size of sand. What can I do to fix this problem. I have already heated it up to 170 degrees and it is okay for a while and then these lumps come back.
Thank you
Sharon
Colleen
I’m just wondering if it is actually the shea butter doing this? Here is a blog post that explains the grainy texture that can occur. The key is to heat it up slowly then cool it quickly.
Sarah
At what point do you add the essential Oil? Are you supposed to add it to the hot liquid mixture? Or after you whip it? Thank you😊
Colleen
Only add it in once the mixture has cooled, otherwise the lovely scent will evaporate. I suggest adding it in at step 6 with the arrowroot powder.
Kay Mallard
Love this idea. Would it work putting it in squeeze tubes if I didn’t whip it too much?
Colleen
I think if the tube opening was big enough it would come out. I’ve not actually tried it myself, but interested to see how it works out for you. It is much cleaner to use tubes than the jar.
Kay Mallard
Many thanks for the reply. I’m going to give it a try now 😀😀
Christina
I tried for the first time and I had the same issue all of you had with the cooling time, I live in FL and maybe I needed to leave in the fridge more time. I’m not sure if it will whip at all. Thank you
Colleen
Florida is much hotter than where I live. You could speed the cooling process up by putting it in the freezer instead.
Terry
I have tried several body butter recipes including this one but none of them whip – they make wonderful oils but will not whip up even after lengthy whipping by my kitchen aid mixer. What is wrong?
Colleen
Hi Terry,
Are you making the mixture cold enough before whipping it? Do you live in a hot climate? You may need to double the cooling time in the fridge or freezer. I find when it is really hot, the whipped butter can flatten/melt a bit so I tend to store it in the fridge during the hottest part of the summer.
Jessica
Terry,
Just an additional temperature/whip related thought: in addition to increasing the cooling time, you may also want to experiment with adding a bit more beeswax (maybe double the amount, to start…this recipe calls for a really small amount of beeswax, so you could probably get away with adding a fair amount more). I don’t know for sure if this will encourage your initial whipped texture to form (but maybe?), but if you’re struggling with temperature so much that it won’t even whip to begin with (& it’s almost certainly a temperature issue), if nothing else, the extra beeswax should help your mix STAY whipped, as melting can be a big issue with these types of recipes, too (beeswax has a melting point of 151° F, so this is perhaps an overall increasing-the-melting-point-of-the-whole-mix measure).
But also, ofc as Colleen said, it’s crucial that the mixture is cooled down enough before you even try whipping. Just overall, for sure, you likely need to go colder: as in cooled down more before you whip and maybe even upping the melting point of the whole thing.
Colleen
Thanks Jessica, those are some great tips!
Melanie Bray
First attempt at homemade skincare and I am totally converted. The whipped body butter is divine and feels more lux than anything I buy! As a first timer my main learning curve was realising I needed to allow more fridge time between whippings to get it to whip up all light and fluffy, possibly due to the warmer climate. Also, I found the photos really helpful to re assure myself I was on the right track. Thanks!
Colleen
Hi Melanie,
I’m glad the recipe worked for you.